Choosing Accessories
When Adding Products to an Opportunity
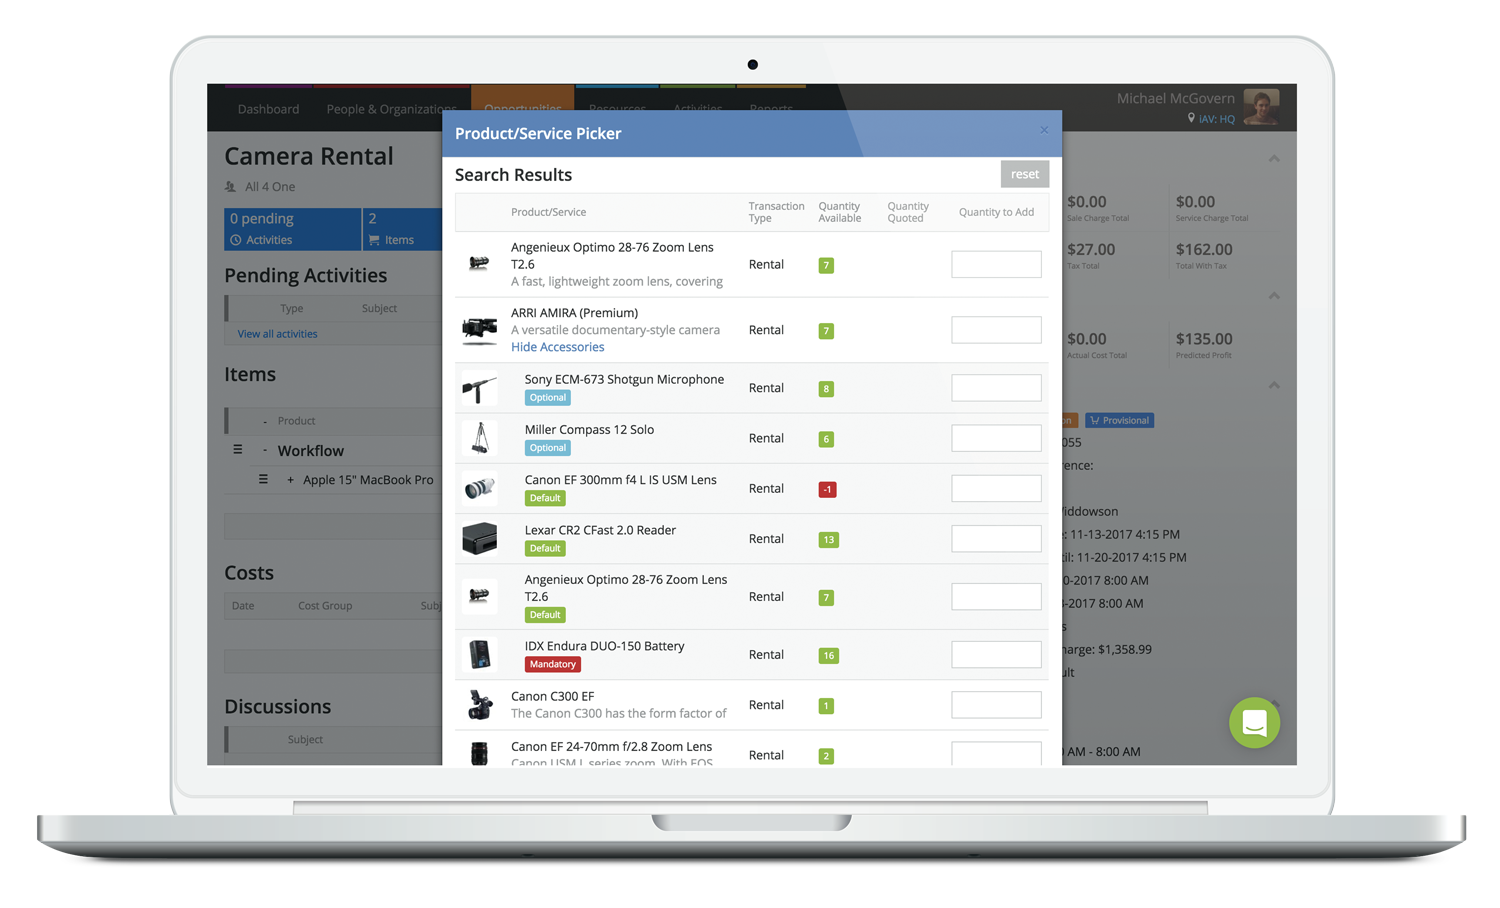
When adding products to a job via the picker, or the add new opportunity item screen, you can now view all the accessories that are linked to these products too, including their availability, by clicking Show Accessories under the product. Not only that, but you can also choose which accessories you want to add to the job, alongside the product. This will help you plan which items you want to send out on a job, right down to the finer details.
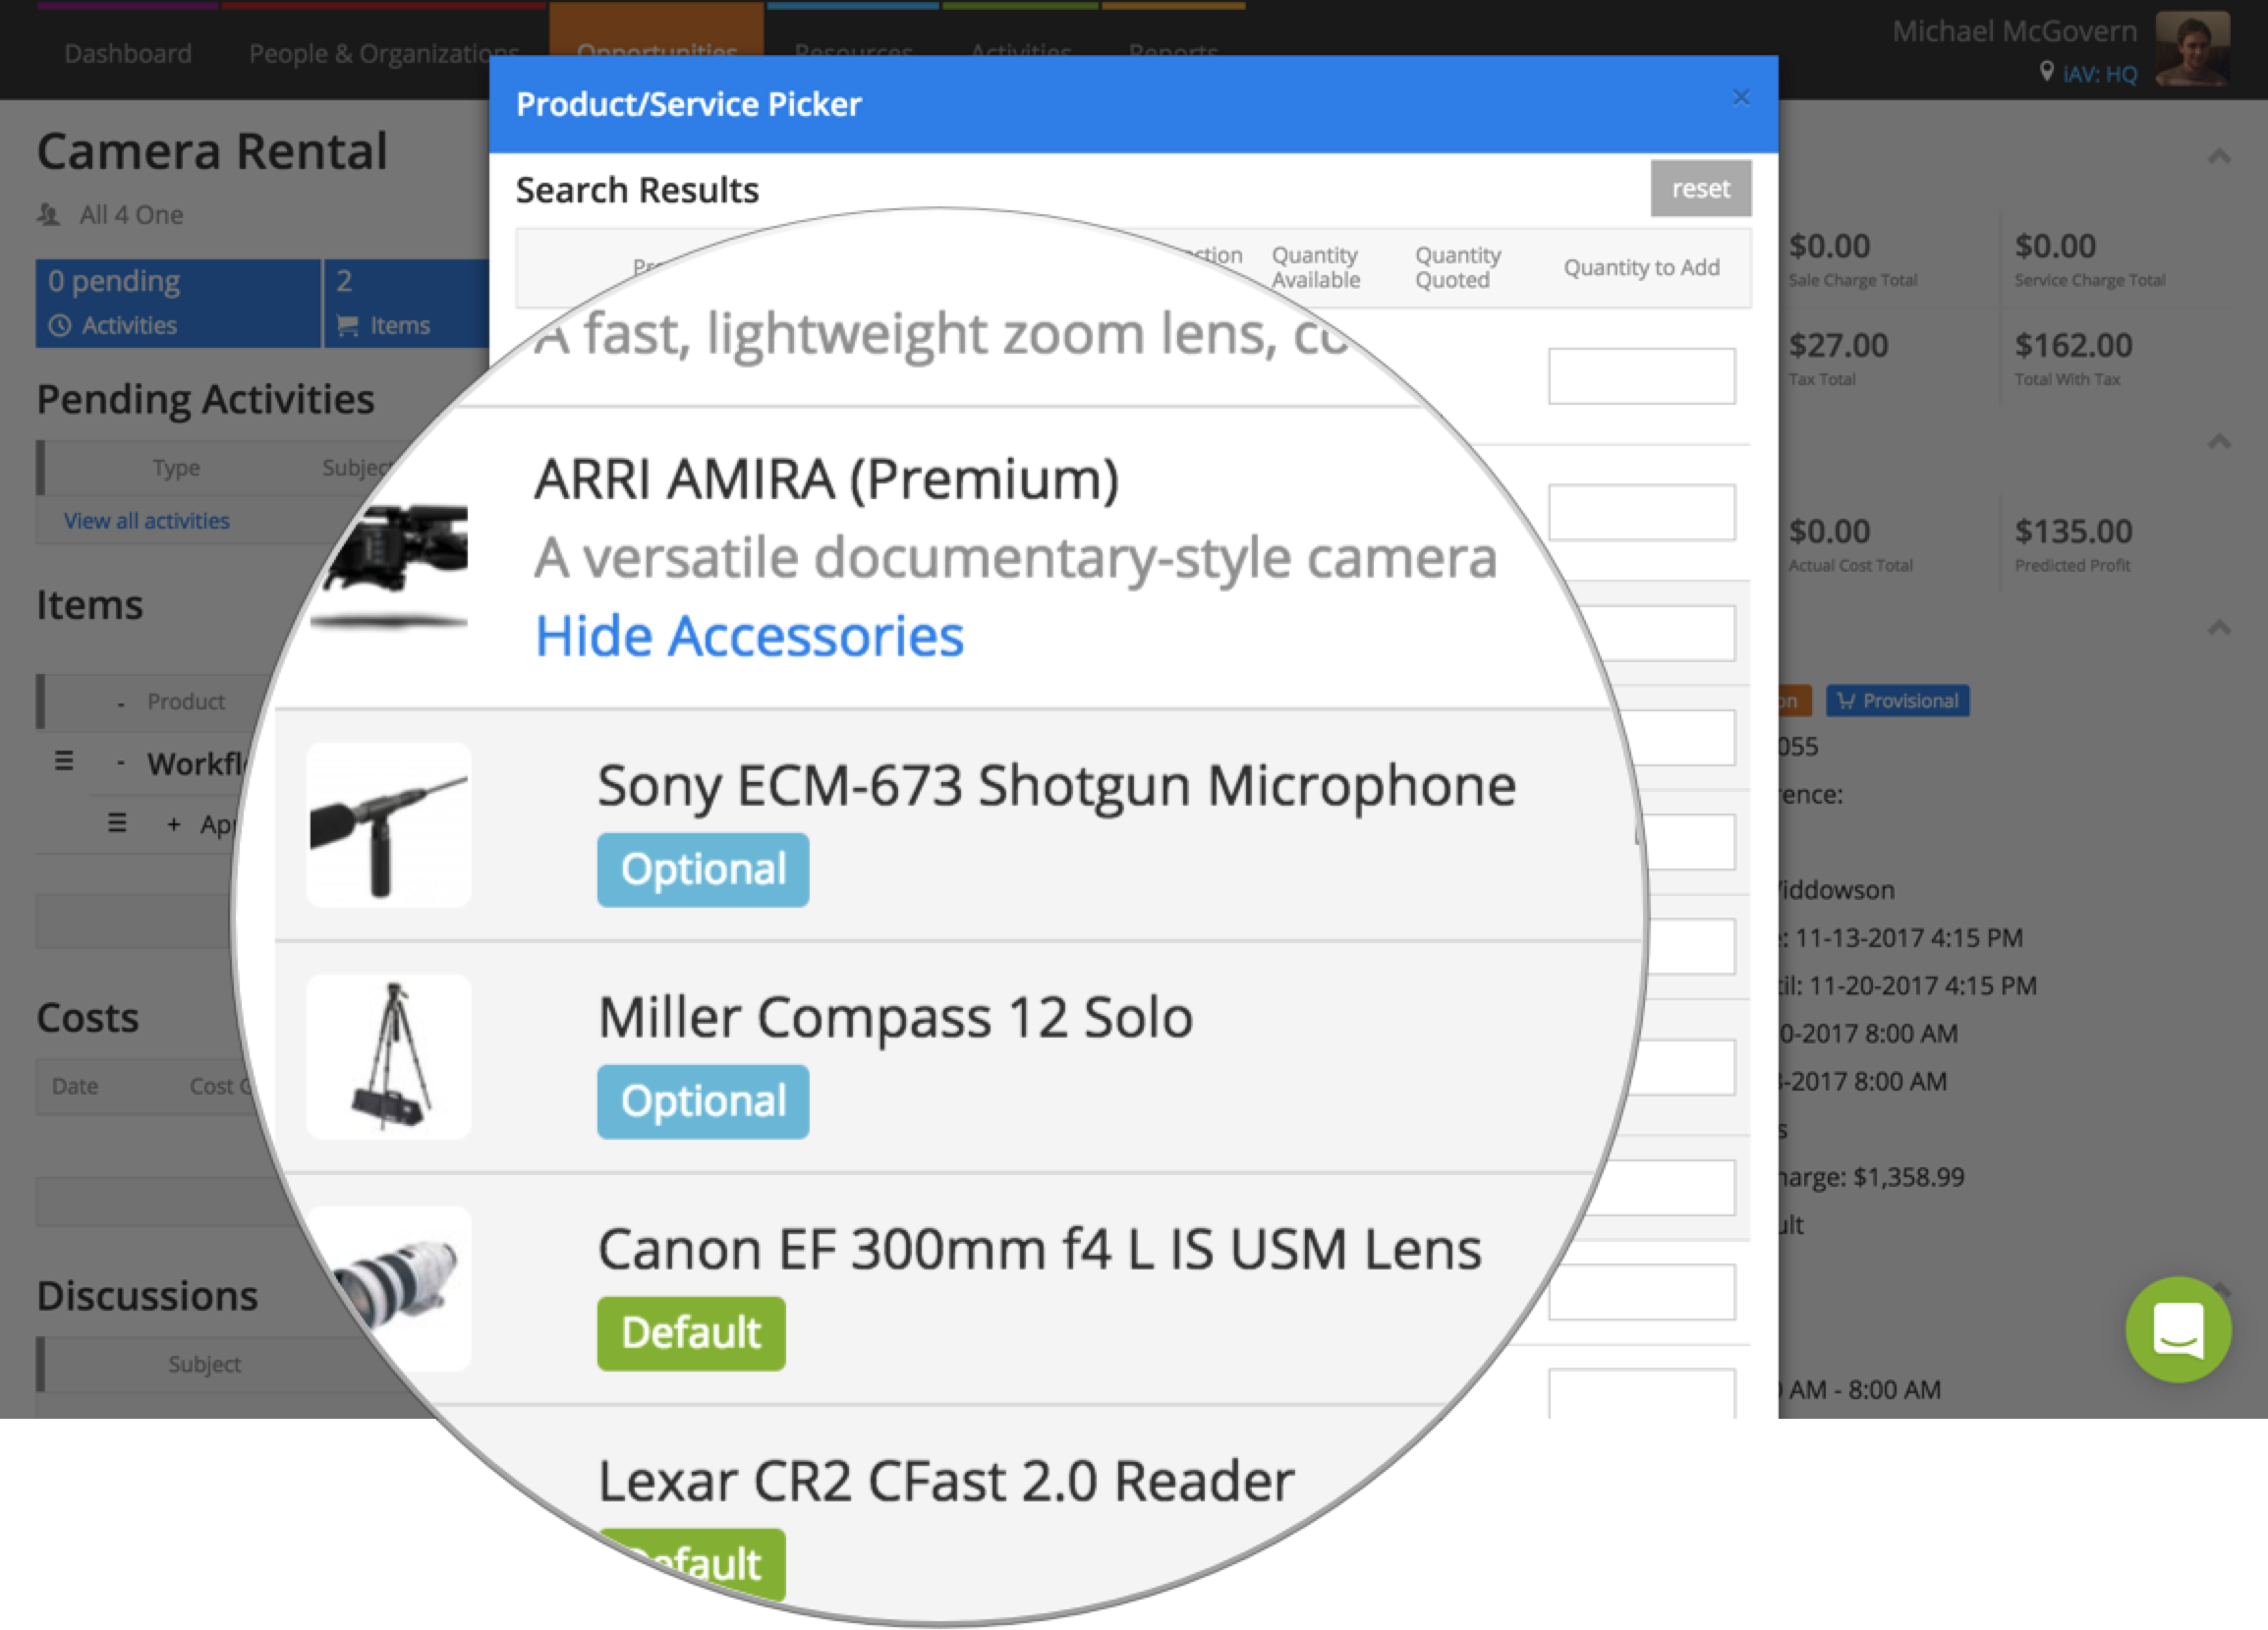
What used to be known as optional accessories, are now called default accessories to better match their behaviour. If you set an accessory up as default, you can specify a quantity and this will automatically be populated when choosing accessories linked to a product.
Mandatory accessories work in the same way as before - the number specified in the Quantity to Add box, is the minimum amount that can be added to the job.
When selecting an accessory as optional, it truly is optional. A quantity will not be included by default, so when you’re choosing an optional accessory to be added to a job, the quantity next to that accessory will read 0 - giving you the option of whether you’d like to include it, or not.
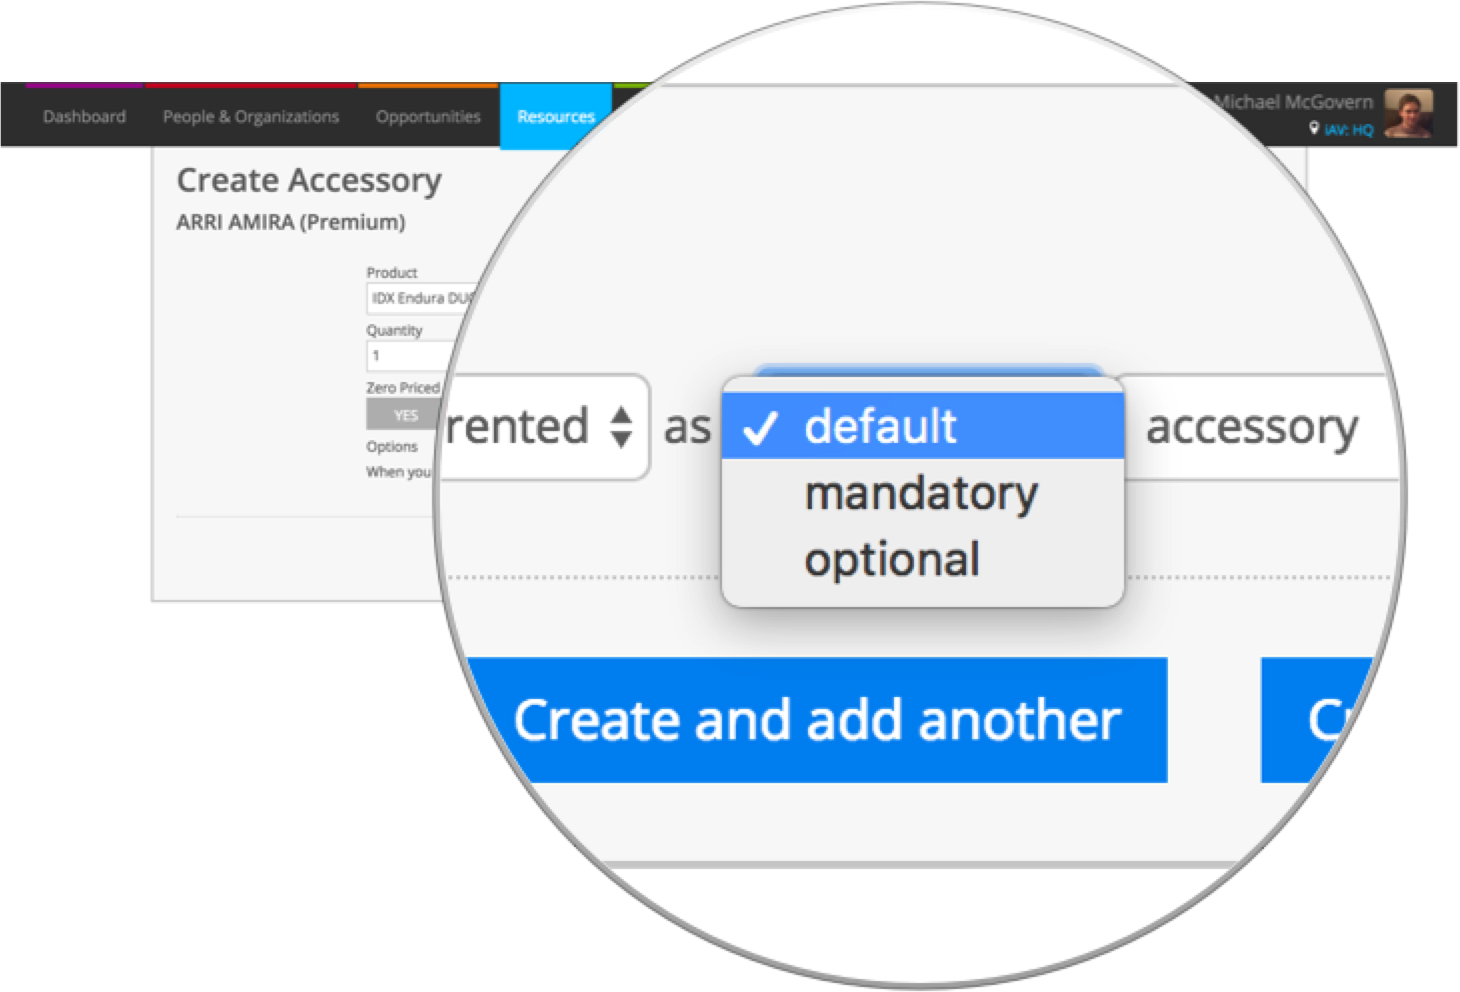
To get started, use the inclusion drop-down when creating the accessory to decide whether it’s default, mandatory or optional.
For more information on Choosing Accessories, check out our guide.